Prior to submitting data, you must create an account. If you are currently registered with the Bamboo Health PMP Clearinghouse system, you do not need to register for a new account—you will be able to add PMPs to your existing account for data submissions. If you have an existing PMP Clearinghouse account, please refer to the Adding States to Your Data Submitter Account article.
Notes:
- Data from multiple pharmacies or dispensers can be uploaded in the same file. For example, chain pharmacies may send in one file containing controlled substance dispensing information for all their pharmacies licensed in the State. Therefore, chains with multiple stores need only to set up one account to upload a file.
- PMP Clearinghouse allows users to submit data through the web portal via manual entry (UCF) or upload of ASAP files. For users who prefer an encrypted transfer method, SFTP access is also available. You may set up your SFTP account during the account creation process.
- If you need to make changes to an existing PMP Clearinghouse upload account, please refer to the additional documentation in the previous Quick Reference Guide document, or section 8 of the CA CURES Data Submission Dispenser Guide, titled Managing Your Upload Account.
- For sFTP submissions, the host is: sftp.pmpclearinghouse.net and the port is: 22
Perform the following steps to create an account:
- Open an internet browser window and navigate to the PMP Clearinghouse Account Registration page located at https://pmpclearinghouse.net/registrations/new.
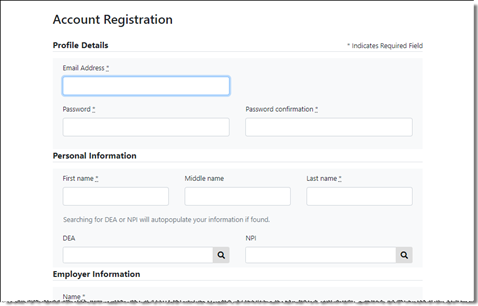
- Complete your Profile Details.
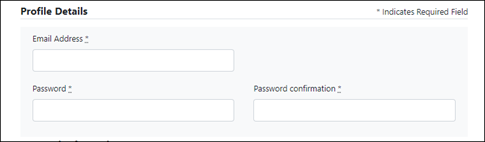
a. Enter your current, valid email address in the Email Address field.
Note:The email address you provide here will act as your username when logging into the PMP Clearinghouse system.
b. Enter a password for your account in the Password field, then re-enter it in the Password Confirmation The password requirements are provided below.
Passwords must contain:
- At least eight (8) characters
- One (1) uppercase letter
- One (1) lowercase letter
- One (1) number
- One (1) special character, such as !, @, #, $, etc.
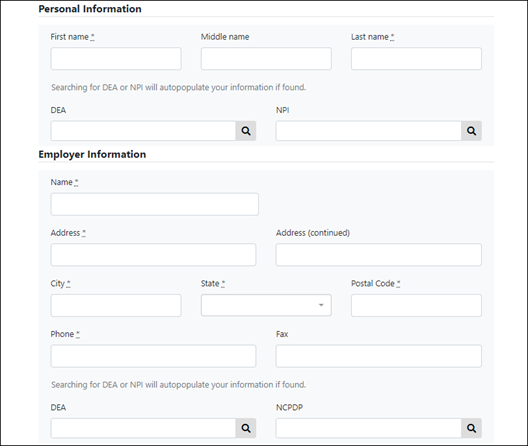
- Complete your Personal and Employer information, noting the following:
- Required fields are marked with a red asterisk (*).
- You may be able to auto-populate your Personal and/or Employer information by entering your (or your employer’s) DEA, NPI, and/or NCPDP number, then clicking the search icon (). If the number you entered is found, your information will automatically be populated.
- If secure file transfer protocol (SFTP) is required, complete the Data Submission section of the page.
Notes:
- If SFTP access is not required, you do not need to complete the Data Submission section and you may continue to step 5.
- You may add SFTP access to an existing account. Please refer to Section 8.3 of the CA CURES Data Submission Dispenser Guide, titled Adding SFTP Access to an Upload Account, for complete instructions.
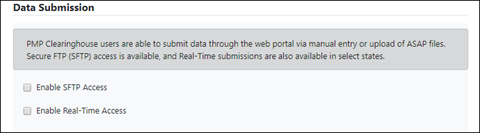
a. Click to select the Enable SFTP Access box.
The SFTP access fields are displayed.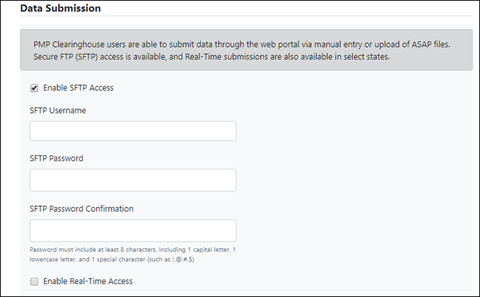
b. Your SFTP Username is automatically generated using the first five characters of your employer’s name + your employer’s phone number + @prodpmpsftp. For example, if you entered “Test” as your employer’s name and “555-555-5555” as your employer’s phone number, your SFTP username would be test5555555555@prodpmpsftp.
c. Enter a password for your SFTP account in the SFTP Password field, then re-enter it in the SFTP Password Confirmation The password requirements are provided below.
Passwords must contain:
- At least eight (8) characters
- One (1) uppercase letter
- One (1) lowercase letter
- One (1) number
- One (1) special character, such as !, @, #, $, etc.
This password will be input into the pharmacy or dispenser software so that submissions can be automated.
Notes:
- This password can be the same as the one previously entered under Profile.
- Unlike the Profile password (i.e., your user account password), the SFTP password does not expire.
- The URL to connect via SFTP is sftp://sftp.pmpclearinghouse.net.
- The Port is 22.
- Additional details on SFTP configuration can be found within the CA CURES Data Submission Dispenser Guide, in Appendix D: SFTP Configuration.
- In the Submission Destinations section of the page, select the PMP(s) for which you will be submitting data.
- Click Submit.
The Registration Information Overview page is displayed.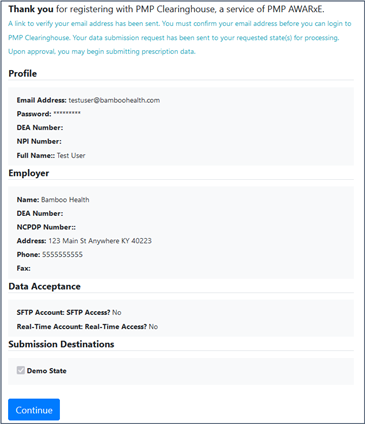
- Click Continue.
The PMP Clearinghouse Login page is displayed; however, you will not be able to log in until your account has been approved. Note that once the registration request has been approved, you will receive a welcome email instructing you to confirm your account. Follow the instructions in the email to confirm your account and begin submitting data to PMP Clearinghouse.